Essential Kegerator Coupler Parts for Your Home Brew Setup
Curious why your draft beer ends up too foamy or disappointingly flat? The secret lies in the small but mighty components connecting your keg to the tap. An improper setup can strip even premium brews of their carbonation and flavor.
We at Installation Parts Supply believe that every great pour is built on top-notch hardware. No matter if you brew at home or simply enjoy draft beer, knowing these keg parts diagram parts makes all the difference.
Whether it’s a washer or a length of gas tubing, each piece helps preserve carbonation and flavor. Over 90% of dispensing issues trace back to worn or mismatched components. With a bit of know-how, you can keep your setup working without a hitch.
Central Ideas
- Proper coupler selection ensures optimal beer flow and flavor.
- Installation Parts Supply offers dependable draft-system hardware.
- Routine upkeep stops most draft issues.
- Different beer types may require specific coupler styles.
- Most system failures originate from coupler-related issues.
Define the Kegerator Coupler
A great pour all hinges on how your keg hooks up to the tap. Think of the keg coupler as the connector between your CO₂ cylinder or nitrogen tank and the beer line, employing pressurized gas to deliver beer flawlessly to your taps. It’s the heart of your draft beer system: no coupler, no flow.
That tiny gadget serves a dual purpose: gas delivery to pressurize and valve control to pour your beer. Inside, you’ll find a probe, a check valve, and separate ports for gas and liquid. Each part ensures your brew stays carbonated and pours without foam.
| Part | Function | Frequent Problems |
|---|---|---|
| Probe | Pierces the keg’s cap | Misalignment causes leaks |
| Check Valve | Prevents backflow | Worn valves lead to flat beer |
| Gas/Liquid Ports | Links to tubing | Loose fittings create foam |
Seventy-five percent of newcomers misattach the coupler, causing issues. The result? Foamy messes, leaks, or worse, spoiled beer. Installation Parts Supply supplies charts and video tutorials to guide you.
Though many couplers look alike, you must pair the correct one with your keg. The incorrect coupler not only spoils the beer, it can wreck your setup.
Types of Keg Couplers and Their Uses
Kegs come in many styles and each needs its matching coupler. Matching the right coupler to your beer ensures optimal carbonation and flavor. Follow this guide to choose the right one.
Standard D System Coupler
Most North American brews—about 85%—use this style. Its single-valve design locks securely onto most domestic kegs. Tip: Check for “Sankey” etched into the coupler.
U System Coupler
Stamped with a harp mark, it’s essential for nitro-charged stouts. A 75% nitrogen mix gives you that signature creamy foam. A U coupler will not seat on a D-type keg—don’t attempt it.
S System (European Sankey) Coupler
Imports from Europe require this S-system coupler. Its reverse thread stops you from screwing it onto a D keg. Fun fact: It’s slightly taller than its American cousin.
A, G, and M System Couplers
German and UK beers demand specialized connectors:
- A-Type Coupler: Fits Paulaner and Warsteiner kegs perfectly. That slider lock never slips.
- G System: Fits Bass and Boddingtons with its tri-flat stem. Found in pubs throughout Britain.
- M-Type Coupler: Locks onto Schneider Weisse kegs. Its click-lock ensures it’s seated.
Their guide highlights D in green, U in black, S in blue. A Midwest microbrewery saved $3,000 yearly by switching to correct couplers. Always favor exact compatibility over “universal” marketing.
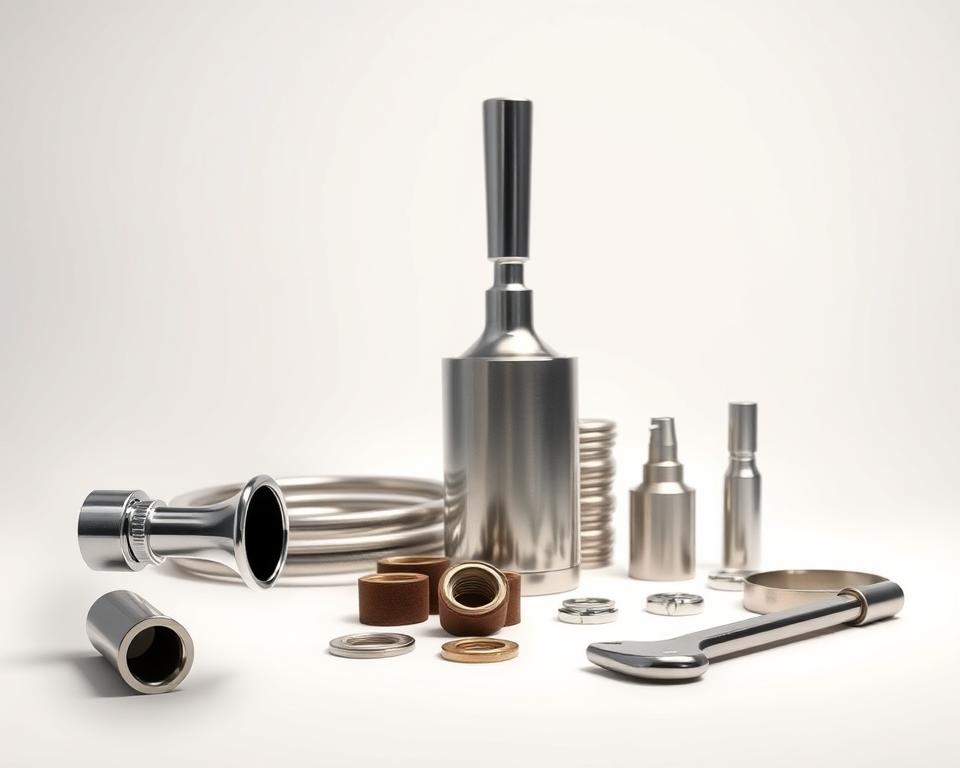
Key Coupler Components Explained
Smooth flows come from well-crafted coupler pieces. Each component helps maintain carbonation and flow. Let’s break down the key hardware that keeps your system running.
Coupler Probe & Check Valve
A stainless probe punctures the seal to regulate flow. Premium models last 3x longer than economy versions. The check valve below prevents backflow and is our most swapped component.
Nut and Washer Assembly
Your seal depends on that hex nut. Brass is economical; stainless fights rust. Pair it with nitrile washers for cold temperatures—EPDM rubber cracks faster below 40°F.
| Component | Material | Advantage |
|---|---|---|
| Probe | SS | Resists wear |
| Check Valve | FDA-approved plastic | Stops foam issues |
| Hex Nut | Brass or Stainless | Balances cost/durability |
Pressure Ports
Your gas port should see 20–30 PSI pressure. Mismatched pressure causes foam. Stick to 3/16″ ID beer lines for smooth pours. Keep a rebuild kit on hand for quick fixes.
Pro Tip: Swap O-rings every 6 months or 50 kegs. A cheap washer swap saves you from a costly rebuild.
How to Set Up Your Kegerator Coupler
Getting your draft system right means perfect pours every time. Right setup stops foam and leaks. Follow these steps to connect everything smoothly.
Connecting the Coupler to the Keg
Raise the lever, line up the lugs with slots. Twist until firm; don’t over-torque or harm the seal. Low-profile designs reduce height by 4–5 inches for tight spaces.
Our wrench sets hex nuts to the ideal 8-10 ft-lb. Most leaks—about 80%—come from probe misalignment. Always use fresh washers to maintain pressure.
Attaching Gas and Beer Lines
Hook the gas line on with 5/16″ fittings. A bit of sealant stops gas leaks. For beer lines, 10–12 feet of 3/16″ tubing balances pressure drop.
| Step | Equipment | Note |
|---|---|---|
| Gas Line | Pipe dope | Check with 30 PSI leak test |
| Draft Line | Pipe cutter | Cut straight for proper seals |
| Pressure Test | Leak detector | Monitor for a full day |
Some setups include apps that track pressure live. Our quick-connects helped a Denver bar slash foam by forty percent. Stop the CO₂ at the source for serious leaks.
Troubleshooting Common Coupler Issues
Foamy eruptions are the quickest way to waste beer. Identify these key spots and you’ll solve most pour problems. Below are common faults and quick fixes.
Foam & Leak Fixes
Foam is blamed in nearly 70% of draft problems. Ensure your temp hovers around 38°F to control foam. If it’s too warm, carbonation goes off too quickly.
Then, look over your draft tubing fittings. A soapy water solution reveals gas leaks through bubbles. Use a wrench to snug loose parts, avoiding over-torque.
- Ball Check Valve failure causes intermittent flow—listen for hissing sounds
- Not sure on PSI? Use this guide:
| Beer Type | CO₂ PSI | N₂ Ratio |
|---|---|---|
| Lagers | 10–12 | N/A |
| Stouts | 25–30 | 75% nitrogen |
Coupler Fit Problems
Loose couplers almost always trace back to worn seals. Installation Parts Supply reports this fixes 40% of attachment issues. If the face is warped, swap the entire coupler.
Use plastic shims to level off rough keg tops. A few dollars in shims cures tilt issues. Choose low-profile for compact spaces.
Pro Tip: Their emergency washer kit contains five critical seals. Staff who learned these tips reduced waste by nearly 20% in Chicago.
If your CO₂ tank frosts up, you’re running too hard. Defrost before tweaking the relief valve. Recalibrate digital gauges every year.
Maintenance for Your Coupler
Clean lines equal better-tasting beer. Residue can dull taste and impede flow. Regular care preserves performance.
Coupler Teardown
Begin with a full teardown. Remove the handle, probe, and check valve. Let the parts sit in warm PBW solution (1 oz/gallon) for 15–20 minutes. That will strip away yeast residue and hop buildup.
Use our brush kit to clean narrow passages. Pay extra attention to the ball valve—it’s a common hiding place for gunk. Rinse fully so no cleaner remains.
Choosing the Right Cleaning Solution
Powdered Brewery Wash excels at safe cleaning. Acids clean quick but may degrade seals. Ultrasonic cleaners remove buildup in pro bars.
- Drying: Blow dry or wipe with a microfiber towel.
- Sanitizing: Meet FDA CFR 117: 30 seconds to sanitize.
- Record-Keeping: Track cleanings with a template.
UV light options add extra protection for rubber components. Rinse waste per regulations—PBW can damage plumbing. Routine cleaning maximizes lifespan and taste.
Wrapping It Up
Savor every pour once you’ve perfected your draft setup. Matching the right hardware, regular cleaning, and proper setup make all the difference. Installation Parts Supply offers lifetime support and seasonal discounts on rebuild kits to keep your pours perfect.
Did you know? Routine care can extend your equipment’s life by 7 years. Get their checklist and attend a brewmaster session for insider advice. One yearly inspection prevents headaches—our long-term customers agree.
Time to level up: head to Installation Parts Supply and improve your home bar.